February 18, 2009
Around The Campfire
March 2009 Issue
February 20, 2009
Welcome to Around The Campfire, a monthly newsletter devoted to camping fun, safety, and of course great camping food!
Have questions or suggestions? We love to hear from you! Please contact us with any questions or suggestions you may have.
If you like this newsletter, please do a friend and me a big favor and "pay it forward."
If a friend DID forward this to you and if you like what you read, please subscribe by visiting Your-Camping-Guidebook.com and filling in the Subscription Box.
In this issue you will find featured:
- What's New At Your Camping Guidebook: New articles posted to Your-Camping-Guidebook.com in the last month
- A Dutch Oven Primer: This article gives you a basic overview of the Dutch Oven and how to use it
- Recipe of the Month: Hot Fluffy Biscuits...From Scratch!
- Monthly Activity:Compass Fun
What's New At Your-Camping-Guidebook.com
Check out our new feature at Your-Camping-Guidebook.com, Ask Camping Jewel. This is an interactive format where you can submit your camping questions and we will directly answer your question. You can also use this feature to share your favorite camping tips and ideas to help other beginning campers. You can find this feature directly on our home page, Your-Camping-Guidebook.com.
Remember to keep up to date with the website by subscribing to our RSS feeds. This lets you know of any new information, and brings this updated information to you.
Find out more and subscribe by clicking the "What is an RSS feed?" link located on the top of the right side of any page at Your Camping Guidebook.
A Dutch Oven Primer

If you like to eat well, a Dutch oven is an important addition to your camping kitchen. While it is a heavy item to bring with you, and you most likely wouldn't use it on a backpacking trip (although I wouldn't put it past my husband to do this!) it is also an extremely versatile tool and more than compensates for its weight with its variety of uses.
You can use your Dutch oven as a frying pan for fried chicken, eggs, bacon, etc.; you can also use it as a pot for boiling water for pasta or making soups or stews; you can use it as a roaster and while at camp make a roast chicken or a roast beef; and of course you can use it as an oven, baking whatever will fit in it, including cakes, bread, lasagna and more.
Dutch ovens are addicting...they are so easy to use that once most people start cooking with them, they end up buying several. And a good quality Dutch Oven is an investment that, with proper care, will outlast you!
Stackable and easy to use, you can have chicken roasting in one, rice pilaf cooking in another, and a vegetable side dish cooking in a third for a delicious three-course meal while camping. Or have your main dish cooking in one while baking a delicious cake for dessert in another.
With Dutch ovens the meals you can cook while camping are endless. So branch out and stop limiting yourself to the grilled chicken, hamburgers, hot dogs, or canned meals when camping. Try some Dutch oven cooking meals to make your camping trips wonderfully delicious!
Recipe of the month:
This month's recipe is meant to introduce you to baking in a Dutch oven. Cooking biscuits from scratch on a camping trip can be a very intimidating thought for many people. But with a little preparation most of the work can be done in the comfort of your own kitchen in advance, leaving some final mixing and the baking to be done on site.
Try this delicious recipe and impress your friends and family with your camp cooking skills!
Dutch Oven Biscuits2 cups all-purpose flour
6 tablespoons buttermilk powder or powdered milk
1/4 teaspoon baking soda
2 teaspoons baking powder
1 teaspon salt
1/4 cup shortening
3/4 cup water
First light your charcoal for the Dutch oven with your charcoal chimney starter.
Combine your flour, buttermilk powder, baking soda, baking powder, and salt in a mixing bowl. Cut in the shortening until the mixture resembles a crumbly meal. You may store this dry mix in a sealed plastic bag for weeks until ready to prepare biscuits.
Stir in the water. You can now decide whether you want drop biscuits or cut biscuits. For drop biscuits, simply drop golf ball size spoonfuls of dough in Dutch oven with about 1" between balls.
For cut biscuits, roll dough out about 3/8" thick. Cut biscuits using a cup, biscuit cutter, or even an empty can. Place in the Dutch oven about 1" apart. Cook for about 10 minutes. The biscuits should start to brown. Serve with butter and jam, or sausage gravy and enjoy!
Some Notes:
- Because we make the dry mixture in advance, we like to use the buttermilk powder or powdered milk in the mix and then add the water when preparing it to make it easier to carry and nonperishable. However, you can use liquid milk or buttermilk instead, by replacing the water with your milk or buttermilk, and omitting the powdered buttermilk/milk from the recipe.
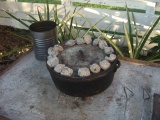
- We usually put 16 briquettes on top in a circle around the edge of the lid, and 8 in a circle underneath the Dutch oven. If the weather is cold and damp, you may want to increase the number of briquettes.
Compass Fun When Learning How To Read A Compass

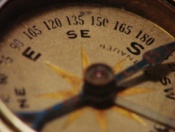
Knowing how to read a compass is a great skill for young and old to learn. Learning how to use a compass is an educational lesson that can be turned into a fun outdoor camping adventure. The two main compasses most people will come in contact with are sighting compasses or lensatic compasses, and baseplate compasses. Baseplate compasses are used mainly with topographical maps for orienteering, but you can also use these for finding your direction without a map. In our exercise today we will be using a baseplate compass.
First, let us look at how to use a compass correctly. To make sure your compass bearing is accurate, you should make sure you are not using a compass next to items that will pull it off course. Electical equipment, items made of iron or steel including concrete structures with steel reinforcement, buildings, bridges, tables with steel hardwarde, knives and tools on your belt, even your belt buckles, all of these items can influence your compass reading, and not in a positive way!.
Now to get starting with using a compass, hold the compass in your palm, propped against your chest so that it is level. Stand in a comfortable position, relaxed, so you naturally face the direction for which you wish to find your bearing. Look down at the compass and slowly turn the compass until the needle or card points to the N or 360 degree mark on the base or ring of the compass. Finally, read the number that is directly across from you and pointing toward the direction you want to find the bearing.
Now for the fun part. Here are some great exerices to teach you and your children a little bit about using a compass. You can use these when you are family camping, or even in your backyard or neighborhood park. The first exercise is to set up a simple compass course. To set up the course mark out a set of directions using compass bearing and distance to travel from a set starting point. To do this, select a starting point that is a stationary landmark such as a wooden sign post, fire ring, etc. Take a bearing on the compass in the direction you intend to travel. Count the paces to the point where you are going to stop to change direction. Repeat the process as many times as you like keeping in mind each turn will make the course more challenging. And at the end of the course, place an object you want the others to find. So you will now have a course marked out with an object at the end of it.
The others are then given the set of directions to follow and use their compass to follow the course and find the object. You can declare the winner based on who stops closest to the marker at the end of the course or you can have a goody bag there so all of them can have a "prize" at the end of the course.
Be aware that a pace may vary from one person to the other and participants will have to adjust length of their pace to match the pace of the person laying out the course.
Another fun camp game for children is to pick one spot where you can see several landmarks in the distance. From that location have the children take the bearing on each of these objects. Next, give each child a paper and pencil or crayon. Have each child draw a map with you at the center. Place the compass in the center and using the bearings they took, draw each landmark on their map. This can be done while sitting under a dining fly or a picnic shelter on a rainy day.
Follow the link to check out some more great camping activities to enjoy when you are camping.
We hope you have enjoyed this issue of Around The Campfire. Until next month's issue I wish you great camping!
Yours in Camping,
Camping Jewel
If you're receiving this newsletter because a friend forwarded it to you, you can sign up for your own copy of Around The Campfire by filling in the Subscription Box at Your-Camping-Guidebook.com.